How to Create a Service Account and API Key
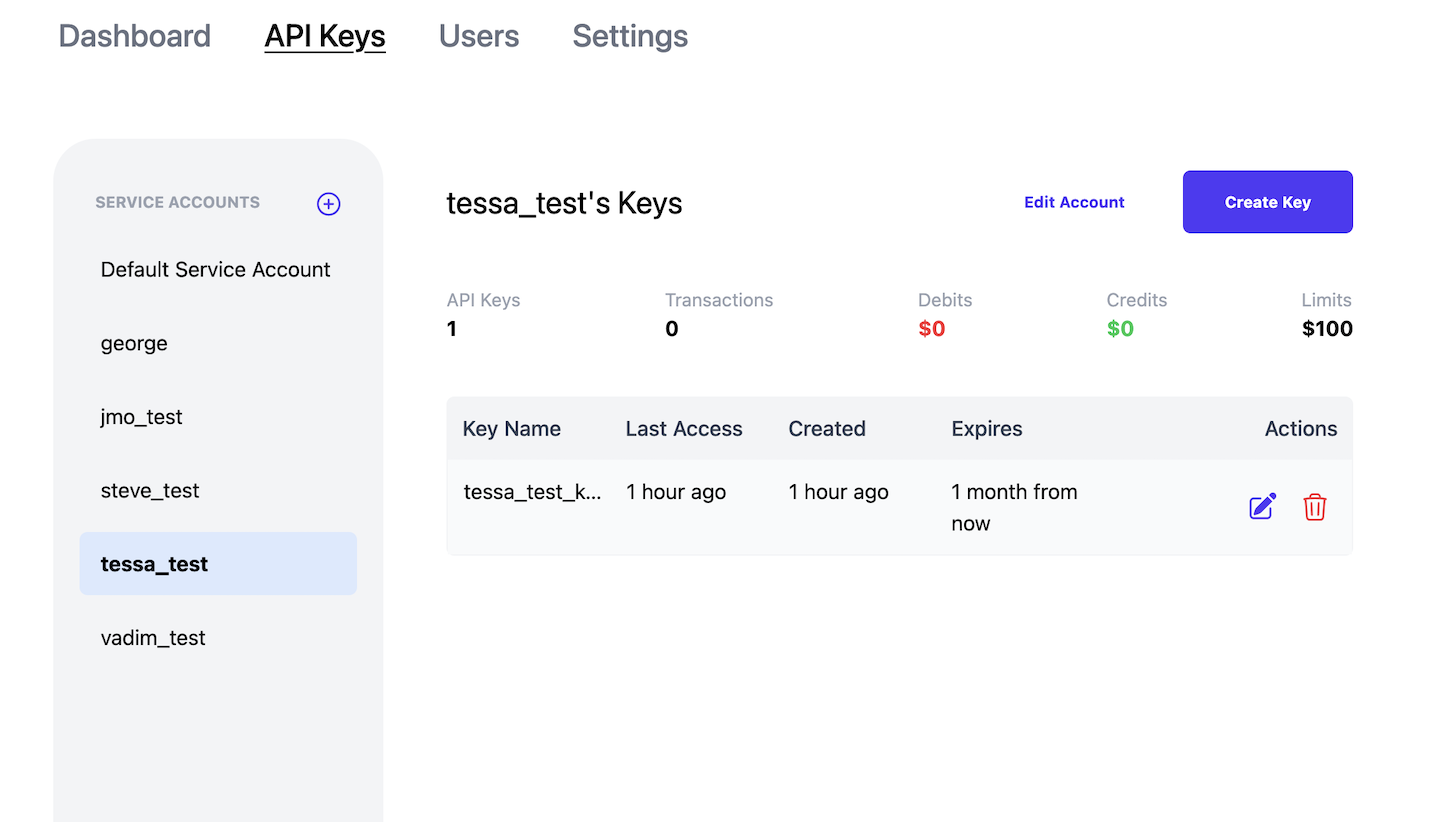
Head to the dashboard in the web console at https://app.confident.security/dashboard and click on the “Create Service Account” button towards the upper right hand corner of the page. This will take you to the API Keys page, which lists the service accounts in your organization on the left hand side. To add a new account, click the plus icon next to “Service Accounts”. Enter an account name and the monthly spending limit. If you don’t wish to have a spending limit for the account, you can switch off the toggle next to “Monthly spending limit”. Once you’ve set up your service account, you can start creating API Keys to use with our confsec CLI and SDK. To do so, navigate to the API Keys page and click on your desired service account. There should be a “Create Key” button in the upper right corner, which will open a pop-up window for you to enter a name and expiration date for your new key. Once you click “Create”, the value of your key will be displayed like so: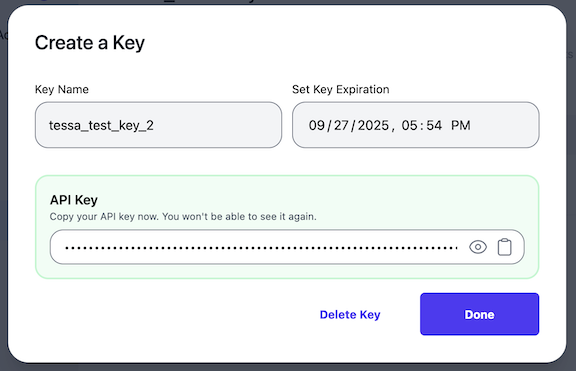
Spending Limits
We support setting spending limits on both a per service account and per organization level. You can change the spending limit that you initially set for a service account by navigating to your service account page and clicking “edit account”. This will open a pop-up where you can reset your spending limit. To set the overall spending limit for an organization, navigate to the Settings page, which will include an option to update your organization’s spending limit. Make sure to select the “Limited” radio button and enter the desired amount in the text box. Remember to click “save” to have your change take effect. Note that you must be an organization administrator or manager to update the spending limit for your organization.Download the Client
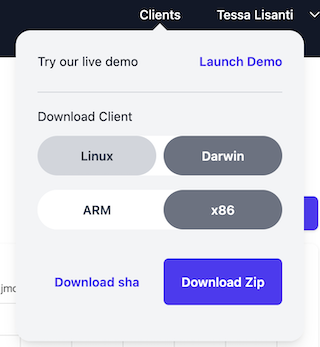
You can download our client directly from the website by clicking the “Clients” button in the top right of the webpage next to your profile name. Select the operating system (Linux or Darwin (mac)) and CPU architecture (ARM or x86) of your device and click either “Download sha” or “Download zip”.